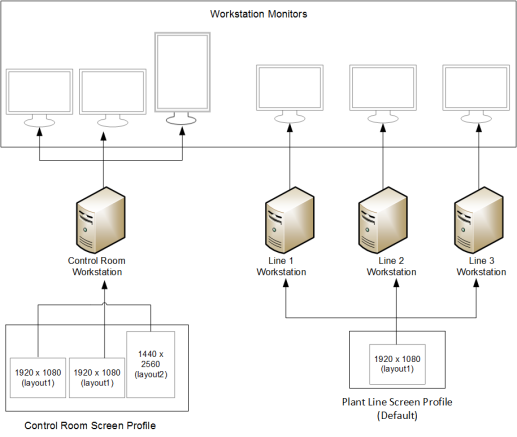
A screen profile specifies the physical characteristics of one or more workstation screens and how these screens are arranged with respect to each other. Each screen icon that appears in a screen profile represents a physical screen.
You can create, manage and configure screen profiles with the Screen Profile Editor, which is displayed below the Screen Profile table in the Setup activity. You can create as many screen profiles as you want.

To add a screen profile to a project:
Selecting a screen profile in the grid displays the arrangement of monitors for that profile.
Screen Profile Properties
|
Field |
Description |
|---|---|
|
Name |
Name to identify the screen profile. Names should be unique within a project, and cannot contain symbols or characters such as /, \, ?, *, “, <, > and |. Names can contain a maximum of 64 characters. |
|
Comment |
Any useful comment about or description of the screen profile. |
|
Property |
Description |
|---|---|
|
Project |
The project for which the specified screen profile is created. |
|
Property |
Description |
|---|---|
|
Screen Name |
The name given to the screen. By default, the primary screen that you add is named "Screen1" and the following screens are named "Screen2", "Screen3" and so on. However, these names may be changed. Note: Screen1 cannot be deleted. However, it can be renamed and re-positioned. Note: The first screen (Screen1) should match the Windows primary monitor configuration on the client workstation. The screen name should follow these naming rules:
|
| Orientation | Whether the display is in Portrait or Landscape mode. |
| Resolution |
Display resolution of the selected screen. You can set the resolution to values between 310 x 310 and 16384 x 16384, or select from the following:
|
| Aspect Ratio | This is automatically set depending upon the resolution of the screen. This cannot be modified. |
| Linked Screens |
Select screen(s) from the list to link to the current screen. The current screen and linked screens share the same context. Linked screens function as a group and can be linked (as a group) to an individual screen. Note: An unlinked screen can be linked only to another unlinked screen individually. Linked screens display a link icon when selected. |
The editor that allows you to manage screens is located below the Screen Profiles table in the Setup activity. A maximum of 20 screens can be added to a profile.
Click  to add a new screen (monitor). A new screen is always added to the right of the selected screen and its resolution is the same as the selected screen. For each screen defined in a profile, you need to specify a name, the screen's orientation and resolution. Also, you need to arrange the screen icons in a screen profile to represent the configuration of actual client workstation screens. You can do this by dragging and dropping the screen icon to match its physical location. The dragged rectangle is red when in an invalid position and green when valid.
By default, the first screen that you add is named "Primary" and the following screens are name "Screen1", "Screen2" and so on. However, these names may be changed in the Screen Profile Property Grid or table. The primary screen displays a solid green tick.
To set a screen as the primary screen, click the clear green tick mark displayed in the top left hand corner of the screen icon. The tick mark changes to a solid green mark, and the screen becomes the primary screen.
Note: The primary screen should match the primary monitor configuration on Windows on the client workstation.
To delete a screen, click  on the top right corner of the screen icon. Alternatively, select the screen by clicking on it and press the Delete keyboard button.
To zoom in/out to view the arrangement of screens, use the slider to increase or decrease the zoom. You can also select the zoom from the list of values next to the slider, or type the required value.
Clicking  adjusts the arrangement of screens to fit the screen. Clicking
  sets the zoom to 100%.
Published June 2018