Add an Equipment Instance
To add an equipment instance to a project, you use the Equipment Editor's Equipment view.
To add an equipment instance:
- Open Equipment Editor.
- Select the Equipment tab.
Or:
Select Equipment from View menu.
- In the Equipment panel, select a location for the equipment instance within the equipment hierarchy for the current project.
- Right-click and select New Equipment.
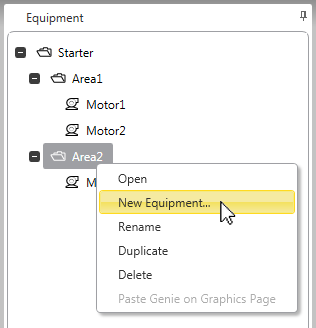
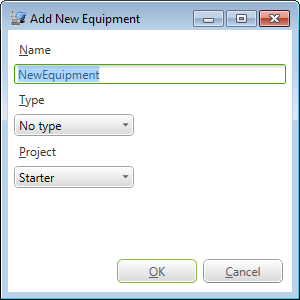
The Add New Equipment dialog will display.
-
Enter a Name for the equipment instance.
The equipment name needs to begin with either an alphabetical character (A-Z or a-z) or the underscore character (_). Any following characters needs to be either alphanumeric characters (A-Z, a-z or 0-9), backslash characters (\), or underscore characters (_). An equipment name does not support spaces.
- In the Type field, use the drop-down list to select the equipment type on which the equipment instance will be based. If you select No Type, the equipment instance will not maintain an association with an equipment type.
- Select the Project to which you would like to add the equipment instance. The drop-down list includes the current project and its included projects.
- Click OK.
The new equipment instance will open for editing, and will appear within in the equipment hierarchy in the specified location.
You can also use the Add New Equipment dialog to add levels to the equipment hierarchy when new equipment is added. For more information, see Add an Equipment Instance to a New Hierarchy Level.
See Also
Published June 2018