Add a Schedule Entry
Schedule entries are used to specify a change of state for a selected piece of equipment. A schedule entry specifies a Start Time and End Time for a particular State.
Note: You can also create recurring schedule entries that follow patterns based on a day, week, month or year. See Add a Recurring Schedule Entry.
To add a new schedule entry:
- Open the Scheduler in the runtime environment and select the Configuration View tab.
- In the equipment tree, select the piece of equipment (or equipment hierarchy location) that requires a schedule entry.
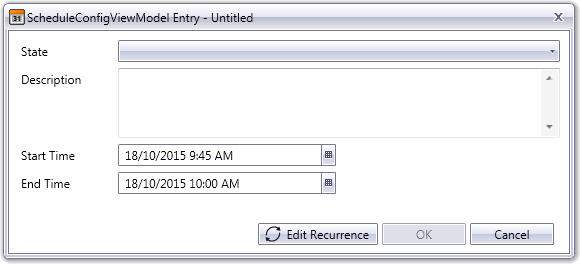
- In the calendar, double-click on the location that represents the date and time at which the schedule entry should occur. The Schedule Entry dialog will display.
Note: If you would like to add a schedule entry at a time where one already exists, you will need to select a time just outside the range of the existing entry and manually adjust the Start Time and End Time accordingly. Be aware that this will create a schedule conflict (see Schedule Priorities).
- In the State field, select the equipment state you would like the schedule entry to execute. The drop-down menu includes the states that are configured for the selected equipment.
- Add a Description of the schedule entry (if required).
- Use the Start Time and End Time fields to specify when the state change should commence and its duration. The button to the right of each field displays a date and time selection tool.
- Click OK.
Note: Special circumstances apply to schedule entries that occur during a daylight savings transition. For example, the transition period is read-only which means schedule entries cannot be added. For more information, see Manage Daylight Saving Transitions.
See Also
Published June 2018