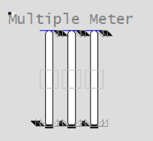
- OP
- ORHigh, ORLow, ORDsp
- PRHigh, PRLow
- OPTrack, PVTrack, TrackDsp
- PV
- SP
- CtrlMode, CtrlModeDef
- AutoCmd, ManCmd, CasCmd
- RunStatus
- OOS, OOSDisabled
| Property | Description |
|---|---|
| Name | Multiple |
| Graphical Representation |

|
| Example Equipment Template | Two or three meter objects |
| Associated Composite Genie | Meter_Multiple.xml |
| Equipment.Items that the Genie expects | |
| Associated Faceplate(s) | |
| Equipment.Items that the Faceplate Expects |
|
|
Option |
Description |
|---|---|
|
Equipment Name |
Enter a name for the equipment associated with the meter. You can enter a maximum of 160 characters for this option. Note: The Multiple Meter equipment needs to be manually configured to reference the name of each meter to be included. |
| Meter Count | Number of meters - select from Duplicated for two meters or Triplicated for three meters. |
| Equipment #1/#2/#3 Name | Enter the name of the equipment object for the first/second/third meter (displayed only if meter count is triplicated). You can enter a maximum of 160 characters for this option. |
| Equipment #1/#2/#3 Prefix |
Prefix applied to the equipment item name for the meters. This allows for displaying multiple values for a single piece of equipment. For example, you want to create three meters to monitor power, voltage and current for a single pump. You would create three meters on the pump and assign the equipment item prefix "Power", "Voltage" and "Current". So, the PV values for the meters would be PowerPV, VoltagePV and CurrentPV respectively. Note: To get a meter with a prefix to work correctly, you need to create tags with the required item names. From the example above, you will need to create the tags PowerPV, PowerOP, VoltagePV, VoltageOP, CurrentPV, CurrentOP and so on. The following equipment item names can be prefixed:
|
|
Meter Type |
From a drop-down select one of the following meters: Level, Flow, Temperature, Pressure, Analyzer, Miscellaneous, and Deviation. |
|
Size |
Size of the meter object image - small or large |
|
Orientation |
Select the orientation that is appropriate for the presentation of the object on the graphics page. |
|
Display Label |
Use this setting to display a label at the selected position. Select None if you do not want to display a label. |
|
Label |
Enter the text that will display at the location specified in Display Label field. You can enter a maximum of 30 characters for this option. |
| Display Alarm Indicator | Shows or hides the Alarm Indicator which indicates the highest priority alarm and its state for this group of meters. |
|
Display Setpoint |
Select to display a setpoint indicator with the meter. |
| Display OOS | Select to display Out of Service indicator. |
|
Mirrored |
Inserts a mirror image of the meter based on the selected presentation options. |
See Also
Published June 2018